نشانی: خ آزادی، خ بهبودی، نرسیده به نصرت، ساختمان بنیامین، پ 145، طبقه 5، واحد 18- مجهز به (2) آسانسور و پارکینگ- تماس: 66097851 (7 خط), 66030825-021

دفتر مرکزی: 66097851     مرکز تعمیرات: 66097859   شعبه شرق :77978135   شعبه هفت تیر: 88836102   شعبه جنوب: 55300568 شعبه غرب 44153186 شعبه شمال 26721443  
شعبه اسلامشهر و رباط کریم 56746602

مرحله ۱ تعویض برد اصلی – کیس بالا

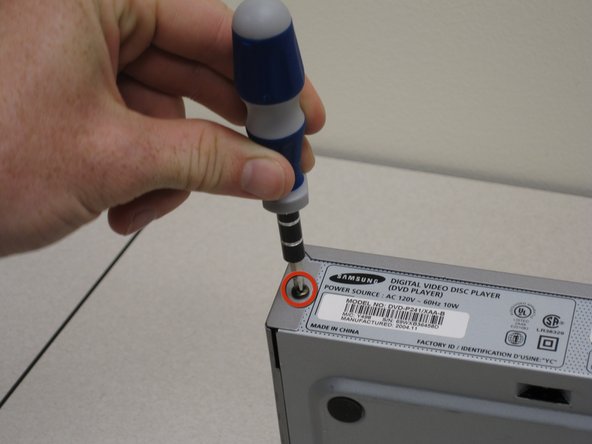
  • پشت DVD پلیر را مقابل خود قرار دهید، ۳ پیچ مشکی ۱ سانتیمتری واقع در سمت راست، سمت چپ و بالا را با استفاده از پیچ گوشتی فیلیپس #۱ بردارید.

You will need to be near a power source for this  guide.With the back of the DVD player facing you, remove the three 1 cm black screws on the right, left, and top sides using a Phillips #1 screwdriver.

مرحله ۲

  • کاور بالا را به سمت خود بکشید تا اینکه بتوان آن را برداشته و خارج نمود.

Pull the top cover towards you until you can lift it up and off.Pull the top cover towards you until you can lift it up and off.

مرحله ۳- پنل جلو

  • در حالیکه جلوی DVD پلیر مقابل شما قرار دارد، آن را روشن نموده و سینی دیسک را خارج کنید.
  • سینی دیسک را با شست فشار داده در حالیکه با انگشت اشاره لبه های چپ و راست کاور نقره ای را فشار می دهید.
  • کاور باید به آسانی سینی دیسک را بلند و خارج کند.

دقت کنید که سینی دیسک در زمان کشیدن ترک نخورده و یا خم نشود.

With the front of the DVD player facing you, turn the power on and eject the disc tray.Press down on the disc tray with your thumbs while also pressing up with your pointer finger on the left and right edges of the silver cover.  The cover should easily pop up and off the disc tray.

مرحله ۴

  • برای برداشتن پنل جلو، گیره های واقع در پایین، چپ و راست DVD پلیر را بلند کنید.

مطمئن شوید که تمام گیره ها در یک زمان بلند شوند در غیراینصورت خارج کردن پنل دشوار خواهد بود.

در صورتیکه برداشتن پنل دشوار است، یک شی را زیر دو گیره در قسمت پایین وارد کرده تا پنل مجددا به جای خود برنگردد.

To remove the front panel, lift up the clips on the bottom, left and right sides of the DVD player.Be sure to have all clips lifted up at the same time otherwise it will be difficult to get the panel off.If you are having trouble removing the panel, try wedging an object underneath the two clips on the bottom to keep them from falling back into place.

مرحله ۵

  • پنل جلو را روبه جلو بکشید و به آرامی بردارید.

Gently remove the front panel by pulling it forward.

مرحله ۶

  • دکمه خروج را مجددا فشار داده تا سینی دیسک به محل خود برگردد.

DVD پلیر را خاموش کرده و قبل از دنبال کردن مراحل بعدی، آن را از پریز قطع کنید.

Press the eject button again to make the disc tray slide back into place.

مرحله ۷- برد اصلی

  • دو کابل نواری مجاور درایو DVD و منبع برق در گوشه چپ و بالای برد (درایو DVD به سمت راست جهت دارد) را قبل از برداشتن برد اصلی، بیرون بکشید.

Take out the two ribbon cables adjacent to the DVD drive and the power supply in the upper left hand corner of the board (with the DVD drive oriented on the right) before attempting to remove the main board.Take out the two ribbon cables adjacent to the DVD drive and the power supply in the upper left hand corner of the board (with the DVD drive oriented on the right) before attempting to remove the main board.Take out the two ribbon cables adjacent to the DVD drive and the power supply in the upper left hand corner of the board (with the DVD drive oriented on the right) before attempting to remove the main board.

مرحله ۸

  • هر یک از ۴ پیچ ۰.۶ میلیمتری را با پیچ گوشتی فیلیپس #۲ واقع در نزدیک گوشه های برد اصلی بردارید که با دایره های قرمز مشخص شده اند.

مطمئن شوید که پیچ ها را برای جلوگیری از گم شدن آنها در جای امنی قرار می دهید.

Remove each of the four 0.6 cm brass screws with a Phillips #2 screwdriver near the corners of the main board indicated by the red circles.

مرحله ۹

  • پس از برداشتن کامل ۴ پیچ، از انبردست برای فشار دادن دو دکمه­ی دو بست سفید استفاده نموده که در سمت چپ مرکز قرار داشته و با دایره های قرمز مشخص شده اند.
  • اکنون که دکمه ها آزاد شده اند، برد اصلی را به دقت از موقعیت خود بلند کنید.
  • در حالیکه برد اصلی را روبه بالا حرکت می دهید، پورت های صدا و تصویر را از پشت کیس بیرون بکشید.

After all four screws have been completely removed, use a pair of pliers to push the two tabs of both white push fasteners located off-center left and indicated by the red circles.Now that the tabs are depressed, carefully lift the main board from it's position in the case. While sliding the main board up, be mindful to pull the video and audio out ports away from the rear of the case.Now that the tabs are depressed, carefully lift the main board from it's position in the case. While sliding the main board up, be mindful to pull the video and audio out ports away from the rear of the case.

مرحله ۱۰

به یاد داشته باشید که برای دور انداختن برد اصلی آسیب دیده، به نزدیکترین مرکز بازیافت خود مراجعه کنید.

  • اکنون کیس DVD را با برد اصلی کاربردی تعویض کنید.

Remember to dispose of your damaged main board correctly by taking it to your nearest recycling center.

یادآوری: با توجه به موقعیت پورت های صدا و تصویر، برد اصلی جدید را در محل خود قرار دهید.

دفترچه پی دی اف راهنمایی در خصوص کار با محصول

در صورت تمایل، به این مقاله نیز سری بزنید: نحوه چک کردن یا تمیز کردن دکمه های P230 دی وی دی سامسونگ

دیدگاه‌ خود را بنویسید

نشانی ایمیل شما منتشر نخواهد شد. بخش‌های موردنیاز علامت‌گذاری شده‌اند *

شانزده − یازده =