نشانی: خ آزادی، خ بهبودی، نرسیده به نصرت، ساختمان بنیامین، پ 145، طبقه 5، واحد 18- مجهز به (2) آسانسور و پارکینگ- تماس: 66097851 (7 خط), 66030825-021

دفتر مرکزی: 66097851     مرکز تعمیرات: 66097859   شعبه شرق :77978135   شعبه هفت تیر: 88836102   شعبه جنوب: 55300568 شعبه غرب 44153186 شعبه شمال 26721443  
شعبه اسلامشهر و رباط کریم 56746602

مرحله ۱ تمیزکردن لنز لیزر – کاور بیرونی و صفحه جلویی

  • سینی را با فشار دادن دکمه خروج باز کنید.
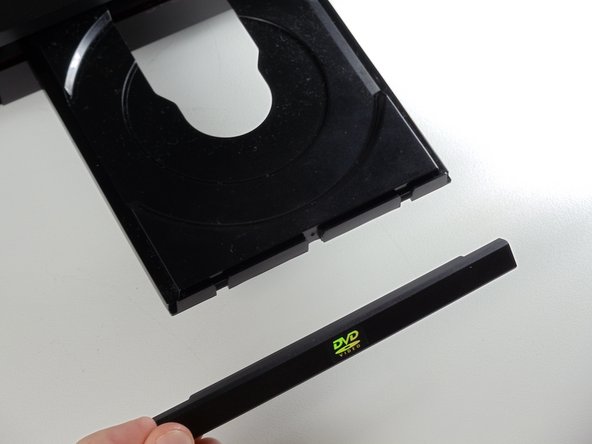
  • صفحه جلویی را از سینی بیرون بکشید تا سینی DVD برداشته شود.

Open the tray by pressing the eject buttonRemove the DVD tray faceplate by pushing the faceplate up off of the tray.Remove the DVD tray faceplate by pushing the faceplate up off of the tray.

مرحله ۲

  • دکمه خروج را فشار داده تا سینی وارد شود.
  • پس از بسته شدن سینی، DVD پلیر قطع می شود.

Press the eject button to insert the tray

مرحله ۳

  • ۳ پیچ واقع در پشت را باز کنید.

Unscrew the 3 screws in the back.

مرحله ۴

  • کیس بیرونی را روبه بالا و سپس به سمت خود بکشید.

Pull the outer case upward and then towards you.Pull the outer case upward and then towards you.

مرحله ۵

  • ۶ دکمه متقارن در جلوی صفحه جلویی قرار دارند. این ۶ دکمه را برای شل شدن صفحه جلویی  آزاد کنید.

There are six symmetrically placed tabs holding in the front faceplate.  Unhook these six tabs to loosen the faceplate.There are six symmetrically placed tabs holding in the front faceplate.  Unhook these six tabs to loosen the faceplate.There are six symmetrically placed tabs holding in the front faceplate.  Unhook these six tabs to loosen the faceplate.

مرحله ۶

  • صفحه جلویی را بیرون بکشید. ۶ دکمه را بطور همزمان آزاد کنید.

Pull off front faceplate. This may take a couple of tries to get all six tabs unhooked simultaneously.Pull off front faceplate. This may take a couple of tries to get all six tabs unhooked simultaneously.

مرحله ۷- سیم برق

  • گیره سفیدی که سیم را به مادربرد متصل کرده است مشخص کنید.
  • گیره را گرفته و آن را بچرخانید تا آزاد شود.
  • سیم برق را بلند نموده و سپس بردارید.
  • پایه سیم را از کیس بیرونی حرکت دهید.

Locate the white clip that attaches the cord to the motherboardGrasp clip and squeeze to releaseLift up and remove power cord

مرحله ۸- سینی

  • ۳ پیچ نگهدارنده سینی DVD را بردارید.

Remove the three screws holding in the DVD trayRemove the three screws holding in the DVD trayRemove the three screws holding in the DVD tray

مرحله ۹

  • سیم برق را برداشته و دو نوار را مستقیما از سوکت های خود بیرون بکشید.

Remove the power cord and first two ribbons by pulling them directly out of their sockets.Remove the power cord and first two ribbons by pulling them directly out of their sockets.

مرحله ۱۰

  • سینی DVD را به آرامی از مادربرد بلند کنید.

Gently lift the DVD tray off of the motherboard.Gently lift the DVD tray off of the motherboard.

مرحله ۱۱- تمیز کردن لنز لیزر P230 دی وی دی سامسونگ

  • چرخ کوچک مشخص شده در تصویر را به سمت راست بچرخانید تا سینی باز شود. در اینجا به مقاومت نسبتا کمی نیاز است.

Spin small gear shown right to begin opening the tray. There should be relatively little resistance in the gear.Spin small gear shown right to begin opening the tray. There should be relatively little resistance in the gear.

مرحله ۱۲

  • دکمه های مشخص شده در تصویر را با انگشت به سمت اطراف سینی بکشید، سینی داخلی حاوی لیزر را آزاد کنید.

Use your fingers to pull the shown tabs towards the sides of the tray, releasing the internal tray that contains the laser.Use your fingers to pull the shown tabs towards the sides of the tray, releasing the internal tray that contains the laser.Use your fingers to pull the shown tabs towards the sides of the tray, releasing the internal tray that contains the laser.

مرحله ۱۳

  • از گوش پاک کن برای تمیز کردن لنز استفاده نمایید.

Use the cotton swab to wipe off lensUse the cotton swab to wipe off lens

راهنمایی در خصوص کار با دستگاه مربوطه

درصورت تمایل از مقاله ما بازدید نمایید: تعویض فیوز HD850 دی وی دی پلیر سامسونگ

دیدگاه‌ خود را بنویسید

نشانی ایمیل شما منتشر نخواهد شد. بخش‌های موردنیاز علامت‌گذاری شده‌اند *

دو × 2 =