نشانی: خ آزادی، خ بهبودی، نرسیده به نصرت، ساختمان بنیامین، پ 145، طبقه 5، واحد 18- مجهز به (2) آسانسور و پارکینگ- تماس: 66097851 (7 خط), 66030825-021

دفتر مرکزی: 66097851     مرکز تعمیرات: 66097859   شعبه شرق :77978135   شعبه هفت تیر: 88836102   شعبه جنوب: 55300568 شعبه غرب 44153186 شعبه شمال 26721443  
شعبه اسلامشهر و رباط کریم 56746602

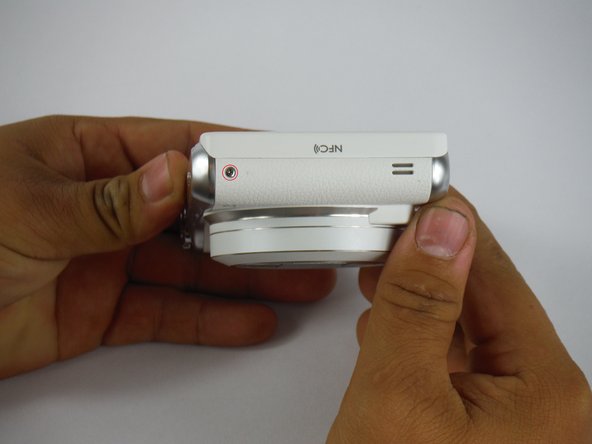
مرحله ۱ تعویض مادر برد – صفحه نمایشگر

  • در حالیکه دوربین را نگهداشته اید، به هر پیچی که صفحه نمایشگر را به شاسی اصلی دوربین متصل کرده است توجه کنید.
  • دوربین را روبه بالا گرفته در حالیکه لنز آن به سمت شما باشد. در کل ۶ پیچ ۴ میلیمتری PH00 وجود دارد، دو پیچ در سمت چپ، یک پیچ در سمت راست و سه پیچ نیز در قسمت پایین. دو تا از پیچ ها زیر درب محفظه باتری پنهان شده اند.
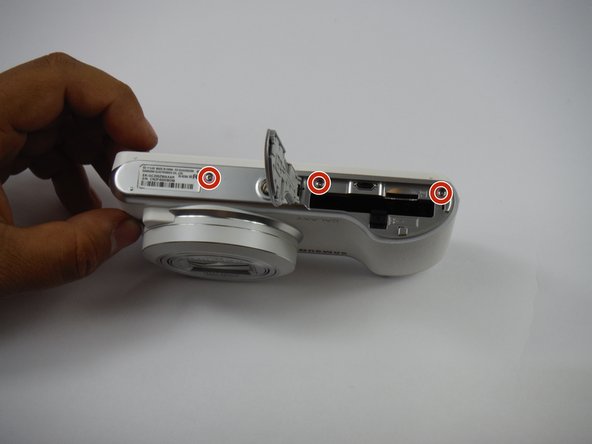
While holding the camera, take note of each screw holding the screen to the main chassis of the camera.Hold the camera upright and lens facing towards you. There area total of six 4mm PH00 screws to undo - two on the left, one screw on the right, and three along the bottom. Two of them are hidden behind the battery compartment door.Hold the camera upright and lens facing towards you. There area total of six 4mm PH00 screws to undo - two on the left, one screw on the right, and three along the bottom. Two of them are hidden behind the battery compartment door.

مرحله ۲

  • از پیچ گوشتی برای برداشتن پیچ های مرحله ۲ استفاده کنید. در کل ۶ پیچ ۴ میلیمتری وجود دارد.
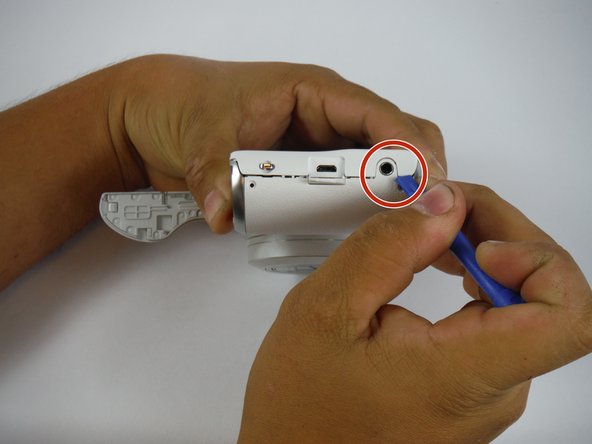
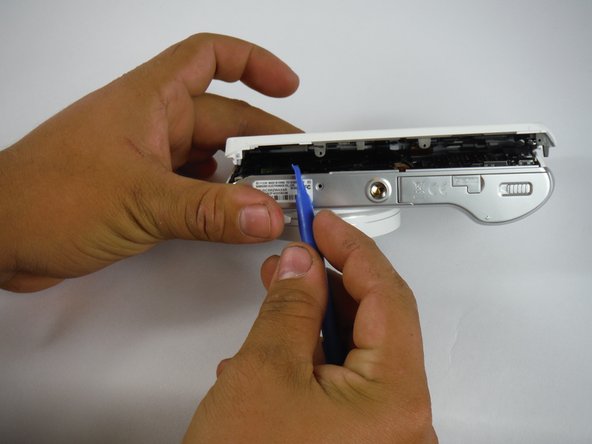
Use the screwdriver to remove screws listed in step 2. There are a total of six 4mm screws.

مرحله ۳

  • پس از برداشتن پیچ ها، از ابزار بازکننده پلاستیکی برای بلند کردن صفحه نمایشگر از شاسی اصلی دوربین استفاده نمایید. ابتدا از گوشه­ی جک هدفون همانند تصویر مقابل شروع کنید.
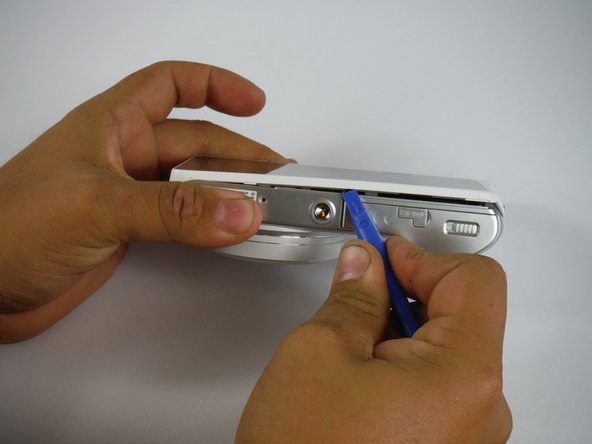
  • پس از آزاد شدن یک طرف، بر روی لبه دیگر و سپس اطراف بدنه دوربین کار کنید.
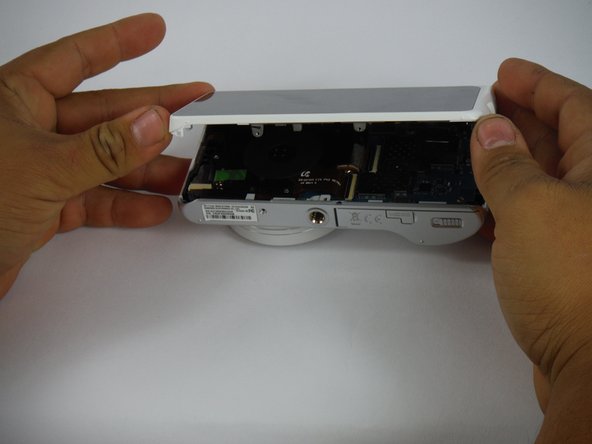
With the screws removed, use the plastic opening tool to gently pry the screen away from the main camera chassis. The ideal spot to start is at the corner with the headphone jack, as indicated in the picture.Once this side is free, gently work your way along the edge, all the way around the camera body.Once this side is free, gently work your way along the edge, all the way around the camera body.

مرحله ۴

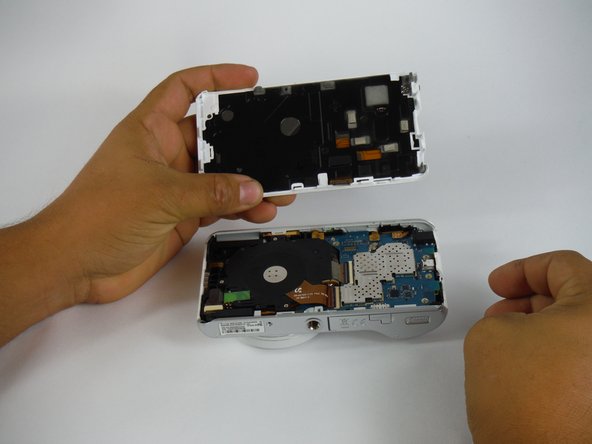
  • با آزاد شدن صفحه نمایشگر، دوربین را به آرامی از قسمت جلوی آن قرار دهید به طوریکه محفظه دوربین مقابل شما قرار بگیرد. از هر دو دست برای بلند کردن صفحه نمایشگر استفاده نمایید.

صفحه نمایشگر هنوز با کابل نواری به مادر برد وصل است.

دقت کنید که صفحه را به آرامی بکشید زیرا بسیار ظریف است.
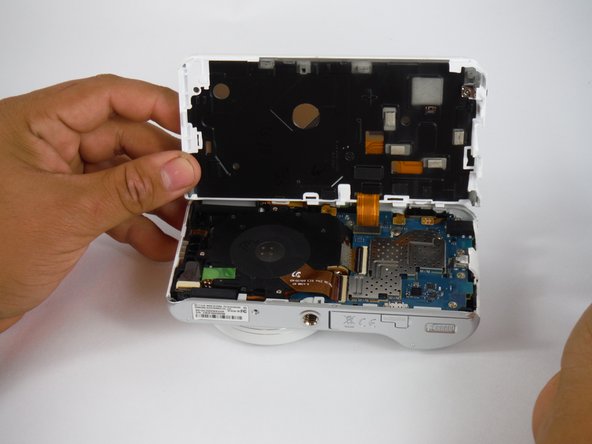
With the screen freed, gently lay the camera on its face, so that the battery compartment faces up. Use both hands to lift the screen up and away.The screen is still attached to the motherboard by a ribbon cable. Be Gentle as it's very fragile.The screen is still attached to the motherboard by a ribbon cable. Be Gentle as it's very fragile.

مرحله ۵

  • پس از جدا شدن صفحه نمایشگر از شاسی اصلی، لبه کانکتور کابل نواری را با ابزار بازکننده پلاستیکی از مادر برد به آرامی بلند کنید.

With the screen separated from the main chassis, use the plastic opening tool to gently pry the edge of the ribbon cable connector from the motherboard.With the screen separated from the main chassis, use the plastic opening tool to gently pry the edge of the ribbon cable connector from the motherboard.With the screen separated from the main chassis, use the plastic opening tool to gently pry the edge of the ribbon cable connector from the motherboard.

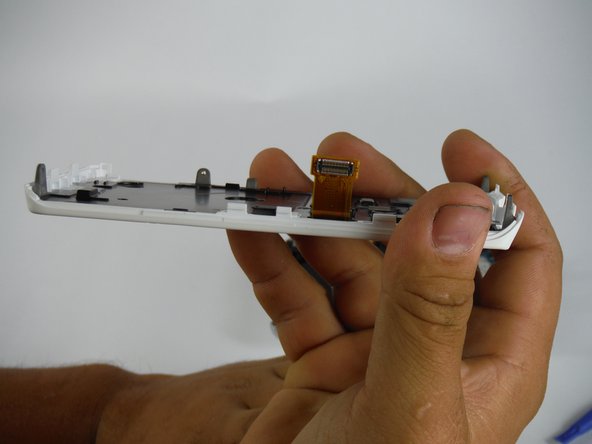
مرحله ۶- جدا کردن صفحه نمایشگر

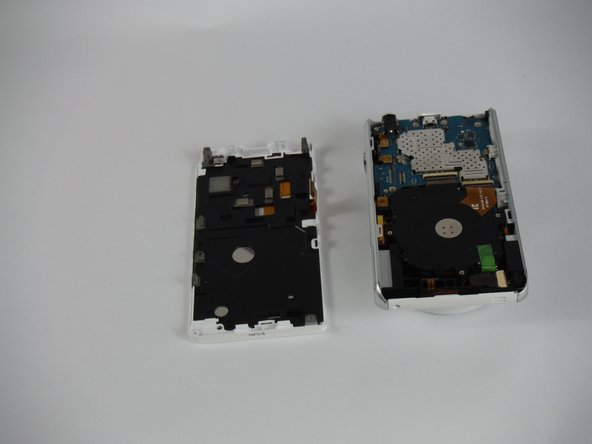
اکنون صفحه نمایشگر برداشته می شود.

  • بدنه را در محل امنی قرار دهید.
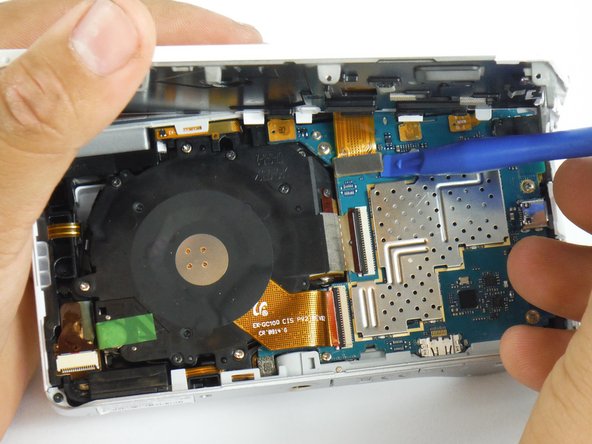
Now the screen is removed.

مرحله ۷- قطعه لنز

  • پس از برداشتن صفحه نمایشگر و باتری برای دسترسی به داخل دوربین، به دو قطعه اصلی داخلی یعنی قطعه لنز و مادربرد اصلی دقت کنید.
  • قطعه لنز در سمت چپ قرار دارد.
  • ۳ پیچ کوچک نقره ای (۴ میلیمتری PH00) را بردارید.

After removing the screen and battery to access to the inside of the camera, take note of the two main assemblies inside-- the lens apparatus and the main motherboard. The lens assembly is on the left hand side.There are three small silver screws (4mm PH00) to remove.There are three small silver screws (4mm PH00) to remove.

مرحله ۸

  • با برداشتن ۳ پیچ، به دو کابل نواری متصل کننده قطعه لنز به مادر برد اصلی دقت کنید.
  • از موچین برای برداشتن دو نوار سبزی که از کانکتورها محافظت می کند استفاده نمایید.
  • از ابزار بازکننده پلاستیکی برای آزاد کردن قفل گیره های مشکی در کابل های نواری استفاده نموده، و سپس کابل های نواری را با موچین به آرامی از مادر برد اصلی بکشید.

With the three screws removed, take note of the two ribbon cables connecting the lens assembly to the main motherboard.Use the tweezers to remove the two green strips of tape protecting the connectors.Use the plastic opening tool to release the black clips locking in the ribbon cables, then use the tweezers to gently pull the ribbon cables away from the main motherboard.

مرحله ۹

  • اکنون که پیچ ها و کابل های نواری برداشته شده اند، قطعه لنز را به آرامی از دوربین بکشید و آن را بردارید.

Now that the screws and ribbon cables have been removed, gently pull the lens assembly up from the the camera and remove it.Now that the screws and ribbon cables have been removed, gently pull the lens assembly up from the the camera and remove it.Now that the screws and ribbon cables have been removed, gently pull the lens assembly up from the the camera and remove it.

مرحله ۱۰- مادر برد

  • پس از برداشته شدن باتری، صفحه نمایشگر و قطعه لنز؛ اکنون مادر برد باید برداشته شود.
  • چندین کابل نواری کوچک به مادر برد وصل است.
  • اطراف کانکتورها را با ابزار بازکننده پلاستیکی به آرامی از مادر برد بلند کنید. در زمان برداشتن مادر برد دقت کنید تا به آنها آسیبی وارد نشود.

Now that you've removed the battery, screen, and lens assembly, you are ready to continue inremoving the motherboard.There are small ribbon cables connected to the motherboard. Use your plastic opening tool and gently pry the sides of the connectors away from the motherboard. Tuck them away to prevent damaging them when removing the motherboard.There are small ribbon cables connected to the motherboard. Use your plastic opening tool and gently pry the sides of the connectors away from the motherboard. Tuck them away to prevent damaging them when removing the motherboard.

مرحله ۱۱

  • پس از برداشتن کابل های نواری، به پیچ های نگهدارنده مادر برد در شاسی اصلی دوربین دقت کنید.
  • دو نوع پیچ وجود دارد که باید برداشته شوند. ۴ پیچ (۲ میلیمتری، PH00) به رنگ قرمز هستند و به اتصال طلایی می روند.
  • ۳ پیچ (۴ میلیمتری، PH00) به رنگ سبز دارای سر پوسته ای می باشند.
  • از پیچ گوشتی IFIXIT و ابزار PH0 برای برداشتن تمام پیچ های نگهدارنده مادربرد استفاده کنید.

After removing the ribbon cables, take note of the screws holding the motherboard into the main chassis of the camera.There are two types of screws to remove. The four (2mm, PH00) circled in red have a fat head, and go in the gold contact.The three (4mm, PH00) screws marked in green have a skinny head.

مرحله ۱۲

  • با برداشتن پیچ ها، از ابزار بازکننده پلاستیکی برای بلند کردن جک هدفون از کیس خود استفاده کنید. مادربرد با جک محکم شده است.
  • سپس، ابزار بازکننده پلاستیکی را به آرامی زیر مادربرد قرار دهید.
  • انگشت خود را زیر آن حرکت داده و کاملا آن را بردارید.

With all the screws removed, use the plastic opening tool to gently pry the headphone jack away from its casing. That jack holds the motherboard in place.Next, gently slide the plastic opening tool underneath the motherboard. Move your fingers underneath and use your hands to completely remove it.Next, gently slide the plastic opening tool underneath the motherboard. Move your fingers underneath and use your hands to completely remove it.

مرحله ۱۳

  • اکنون، مادربرد کاملا از شاسی برداشته می شود.

Now, remove the motherboard completely from the chassis.Now, remove the motherboard completely from the chassis.Now, remove the motherboard completely from the chassis.

مرتبط: تعویض کاور پشت NX1 سامسونگ

انواع مدل دوربین های سامسونگ

دیدگاه‌ خود را بنویسید

نشانی ایمیل شما منتشر نخواهد شد. بخش‌های موردنیاز علامت‌گذاری شده‌اند *

هشت − 4 =