دفتر مرکزی: 66097851     مرکز تعمیرات: 66097859   شعبه شرق :77978135   شعبه هفت تیر: 88836102   شعبه جنوب: 55300568 شعبه غرب 44153186 شعبه شمال 26721443  
شعبه اسلامشهر و رباط کریم 56746602

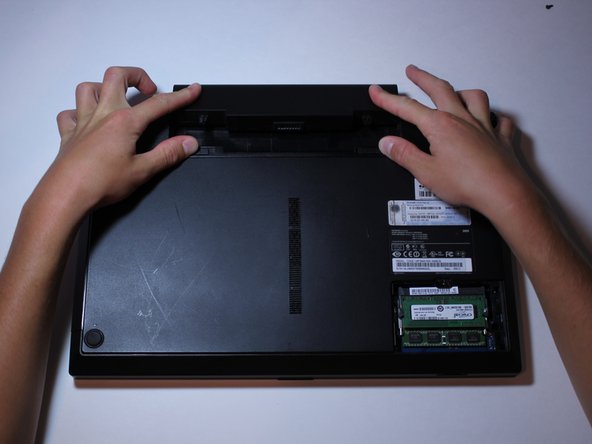
مرحله ۱- کارت وای فای

  • ابتدا مطمئن شوید که کامپیوتر کاملا خاموش است.
  • هر چیز متصل به کامپیوتر از جمله شارژر و درایوهای USB را قطع کنید.
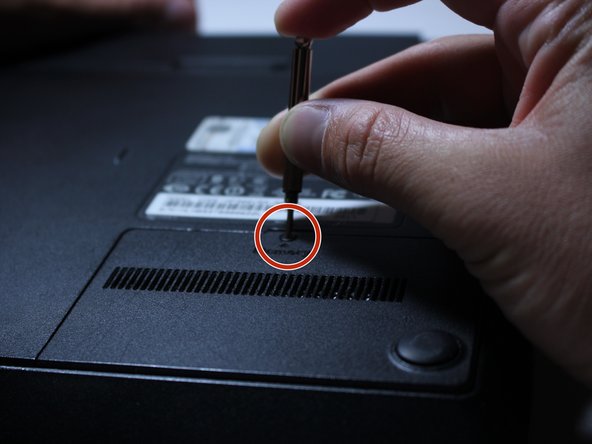
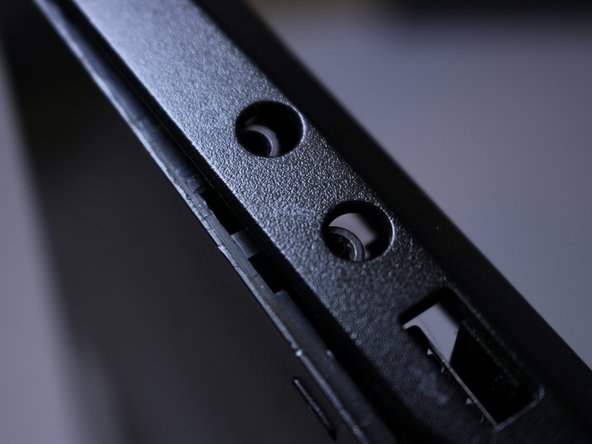
  • پیچ های پنل کوچک واقع در سمت راست و پایین کامپیوتر را باز کنید.

یک پیچ در این مرحله وجود دارد.

در کل این راهنما، فقط یک پیچ ۴.۵ میلیمتری وجود دارد. مابقی پیچ ها ۶.۵ میلیمتر و از نوع فیلیپس #۰۰ هستند.
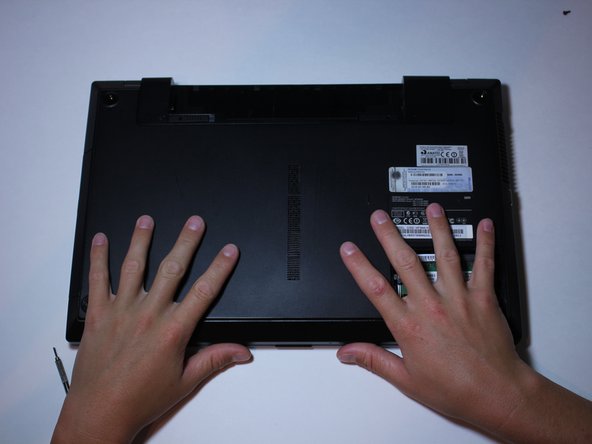
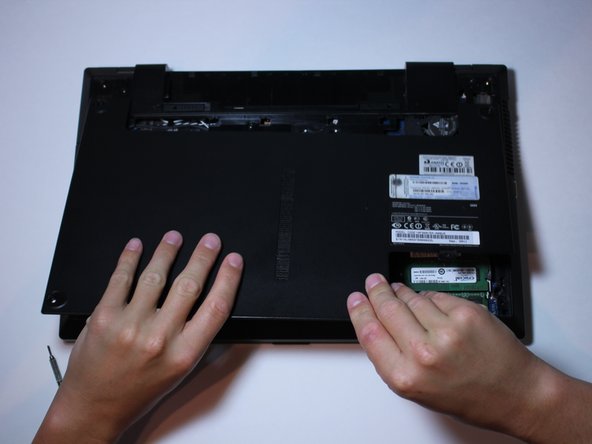
First make sure your computer is properly and completely shutdown.

مرحله ۲

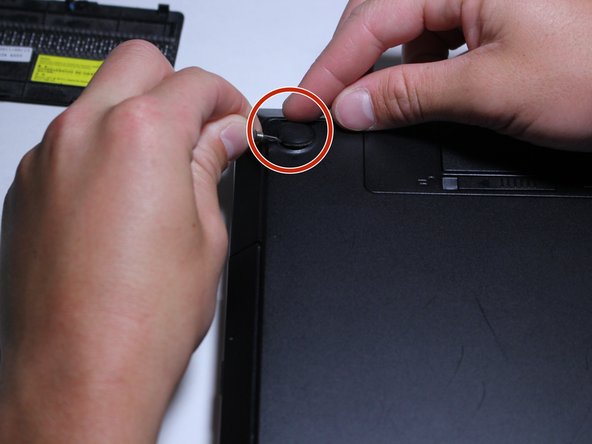
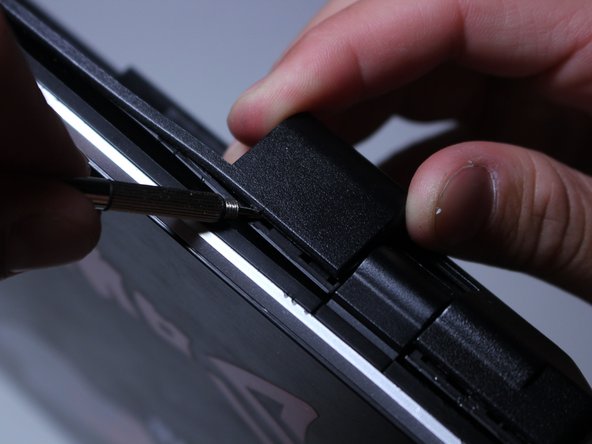
  • از پیچ گوشتی سر صاف برای بلند کردن چفت های پلاستیکی نزدیک سوراخ پیچ استفاده کنید.

در زمان بلند کردن کاور پلاستیکی، صداهایی مانند بلند کردن چفت های پلاستیکی شنیده می شود.

  • از انگشت و پیچ گوشتی سر صاف برای بلند کردن کاور پلاستیکی استفاده نمایید.

Use the flat head side of the screwdriver to pry up the plastic snaps near the screw hole.It is normal to hear noises similar to that of plastic snapping, when prying up the plastic cover.Use your finger and the flat head screwdriver to pry up the plastic cover.

مرحله ۳

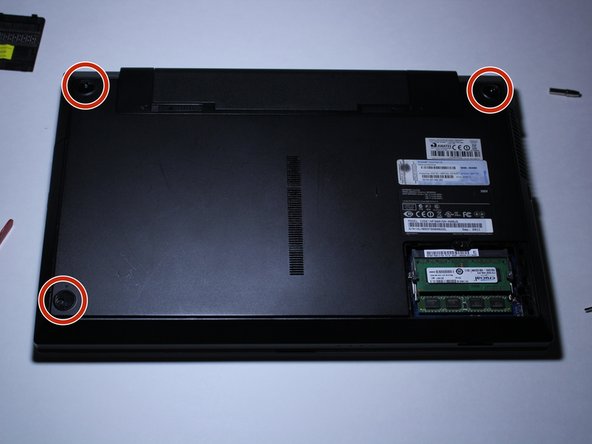
  • پدهای لاستیکی واقع در ۳ گوشه دیگر لپ تاپ را بردارید.
  • از نوک پیچ گوشتی سر صاف برای بلند کردن پدهای لاستیکی استفاده کنید.

توجه داشته باشید که از چسب برای نگهداشتن پدهای لاستیکی استفاده شده است.
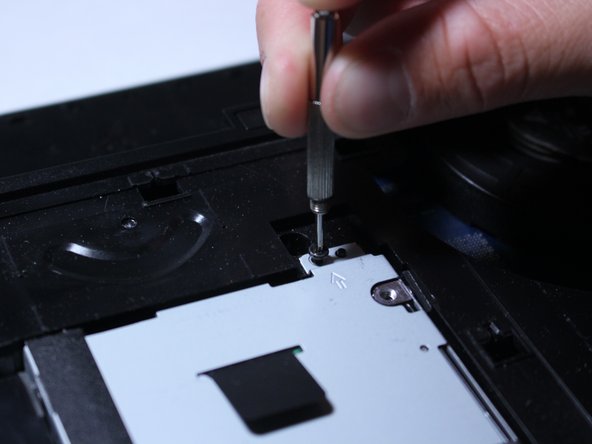
Remove the rubber pads on the remaining 3 corners of the computer.Use the tip of the flat head screwdriver to pop off the rubber pads.

مرحله ۴

  • هر یک از پیچ ها را با استفاده از پیچ گوشتی بردارید.

در طول فرایند پیاده سازی کامپیوتر، مطمئن شوید که قطعات را در جای امنی قرار داده اید تا در زمان مونتاژ مجدد به راحتی به آنها دسترسی پیدا کنید.

Remove each of these 3 screws using the screwdriver.During this tear down process of your computer, make sure to place the parts you have taken off in an organized manner so that you know what goes where, when you are reassembling your computer.

مرحله ۵

  • دکمه های کوچک باتری را در جهات مشخص شده حرکت دهید تا باتری برداشته شود.
  • در حالیکه این کار را انجام می دهید، باتری را بیرون بکشید.

Remove your battery by sliding the little tabs in the directions of the arrows printed on the computer.While doing this, slide the battery out.While doing this, slide the battery out.

مرحله ۶

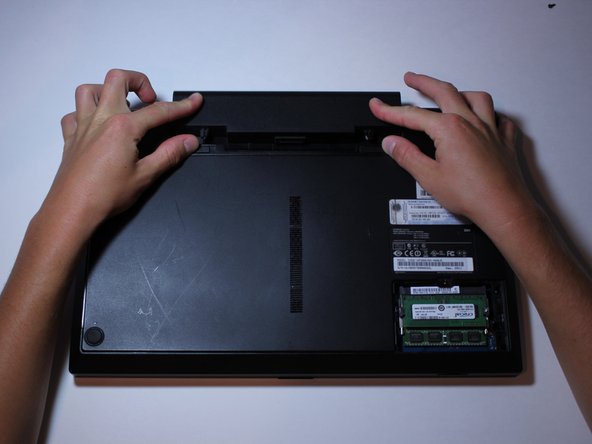
  • دستان خود را در پنل پشت قرار داده و فشار دهید تا پنل چند میلمیتر حرکت کند.
  • در اینصورت پنل پشت آزاد شده و پس از اندکی حرکت دادن آن بلند می شود.
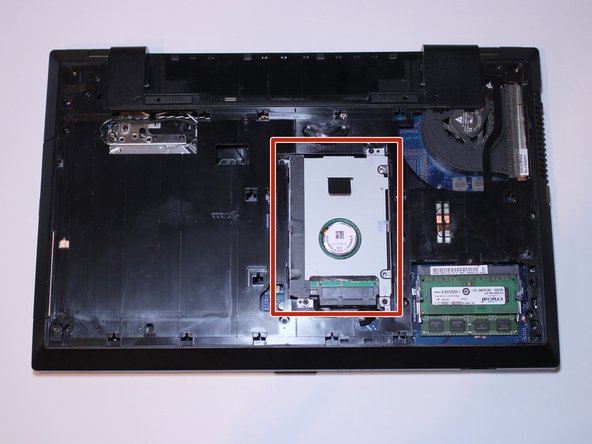
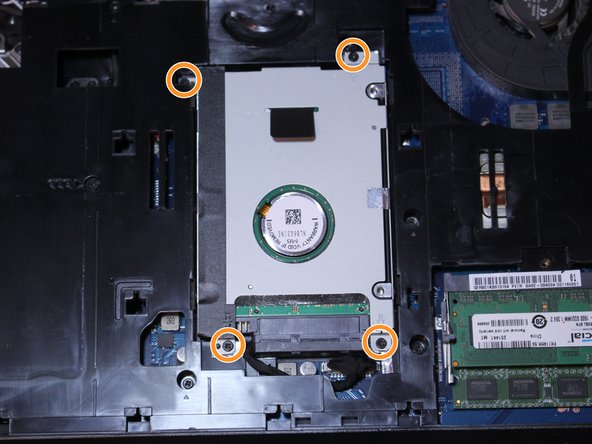
Put your hands on the back panel and use pressure to slide the panel down a few millimeters (as shown in the photo).This frees up the pack panel and you can lift it right off after sliding it down.This frees up the pack panel and you can lift it right off after sliding it down.

مرحله ۷

  • هارد دیسک را بردارید.
  • ۴ پیچ به هارد دیسک متصل است که با پیچ گوشتی باید برداشته شوند.

Remove all 4 screws holding the hard drive in with the screwdriver.This is the hard drive. You need to remove it in order to get to the rest of the computer.Remove all 4 screws holding the hard drive in with the screwdriver.

مرحله ۸

  • در حالیکه دکمه پلاستیکی مشکی را نگهداشته باید، آن را روبه بالا و سمت راست بکشید تا هارد دیسک برداشته شود.

مرحله بعدی شامل برداشتن کابل متصل به کامپیوتر از هارد دیسک است.

While holding onto the black plastic tab, pull up and to the right to remove the hard drive.The next step deals with the removal of the cable attached to the computer from the hard drive.The next step deals with the removal of the cable attached to the computer from the hard drive.

مرحله ۹

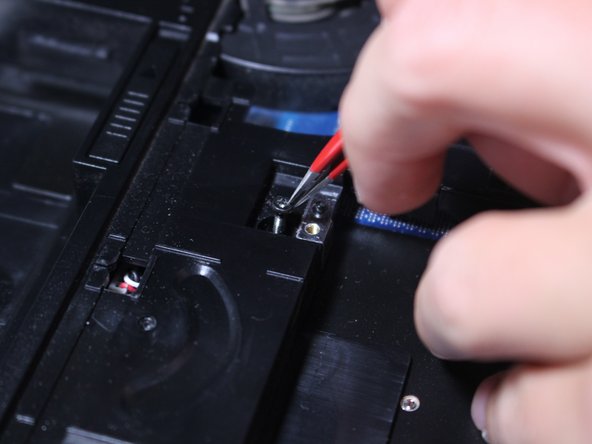
به نحوه اتصال قطعه سیم اطراف قطعه مادربرد و کیس پلاستیکی توجه کنید.

  • قطععه سیم را به آرامی بکشید تا از شکاف عمیق خود بیرون کشیده شود.
  • انتهای پلاستیکی سفید قطعه سیم را با انگشت یا ناخن به آرامی بگیرید.

دقت کنید که سیم ها را نکشید زیرا ممکن است از کانکتور پلاستیکی سفید قطع شوند.

  • کانکتور پلاستیکی را به دقت به پشت و جلو حرکت داده تا اینکه قطعه سیم از کامپیوتر قطع شود.
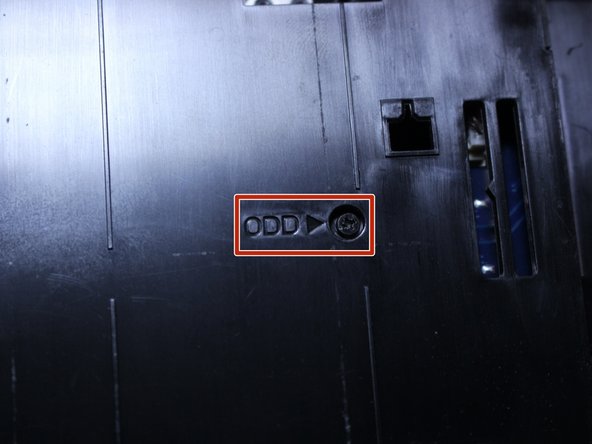
Take note of how the wire harness is routed around the piece of the motherboard and the plastic casing.Gently pull on the wire harness to get it out of the crevasse.Gently grab a hold of the white plastic end of the wire harness with your fingers or fingernails.

مرحله ۱۰

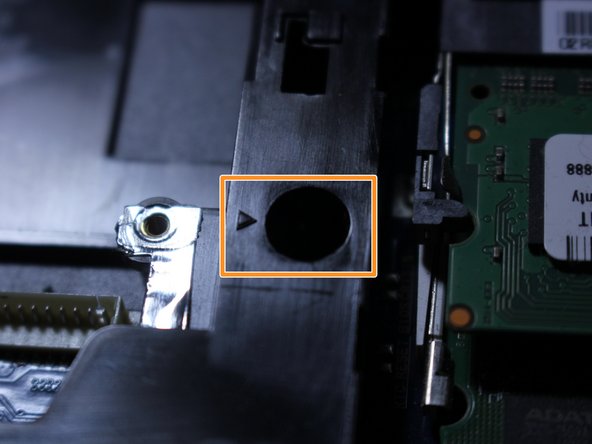
  • پیچ مشخص شده با علامت ODD را مشخص کنید.
  • این پیچ را با پیچ گوشتی بردارید.
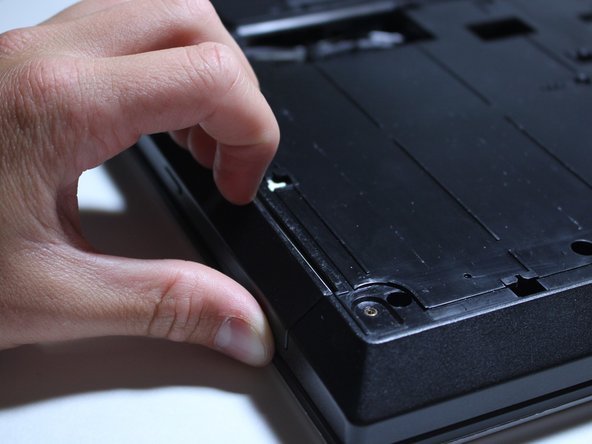
Locate the screw next to the "ODD" print as indicated in the photo.

مرحله ۱۱

  • ناخن خود را بین شکافی که دیسک درایو نوری است بچسبانید و فریم پلاستیکی کامپیوتر را بیرون بکشید.
  • با دست (یک یا دو دست)، درایو دیسک نوری را به آرامی به بیرون بکشید تا برداشته شود.

Stick your fingernails between the slight gap where the Optical Disk Drive slides out and the plastic frame of the computer.Using your hand (you might need to use both), pull outwards to slowly remove your Optical Disk Drive from your computer.Using your hand (you might need to use both), pull outwards to slowly remove your Optical Disk Drive from your computer.

مرحله ۱۲

  • ۱۳ پیچ ۶.۵ میلیمتری وجود دارند که در این مرحله باید برداشته شوند.
  • محل هر پیچ در تصویر با رنگ نارنجی مشخص شده است.

از موچین برای برداشتن پیچ های شل استفاده نمایید.

There are thirteen 6.5mm screws you need to remove in this step.Each screw location is designated by the arrow icon highlighted in orange in the second photo.Use your tweezers to remove loosened screws.

مرحله ۱۳

  • در چندین مرحله بعدی به نحوه برداشتن روکش بیرونی کامپیوتر اشاره می شود.
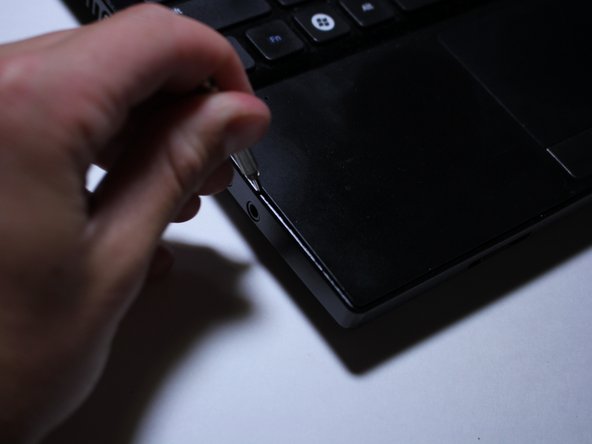
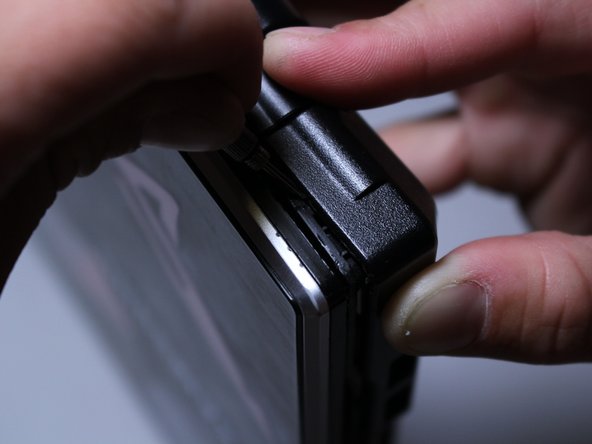
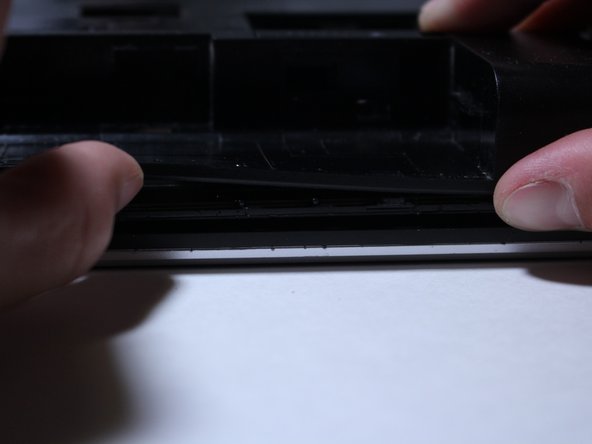
  • از پیچ گوشتی سر صاف برای بلند کردن دو قطعه پلاستیکی استفاده کنید.
  • خط کوچکی بین این دو قطعه پلاستیکی در یک سمت کیبورد وجود دارد.

The next several steps will show you how to remove the outer shell of the computer.Use the flat head of your screwdriver to pry apart the two pieces of plastic.There is a discrete little line between the two pieces of plastic on the side of the keyboard.

مرحله ۱۴

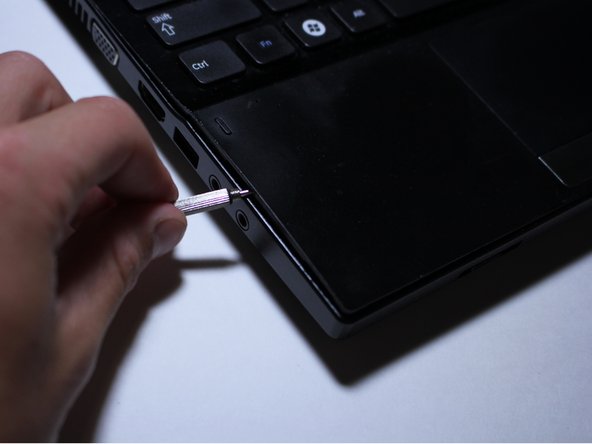
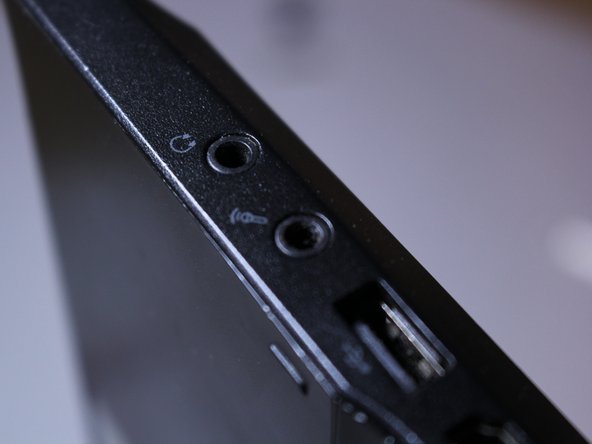
  • حرکت دادن جک هدفون کامپیوتر به راحتی انجام می شود.
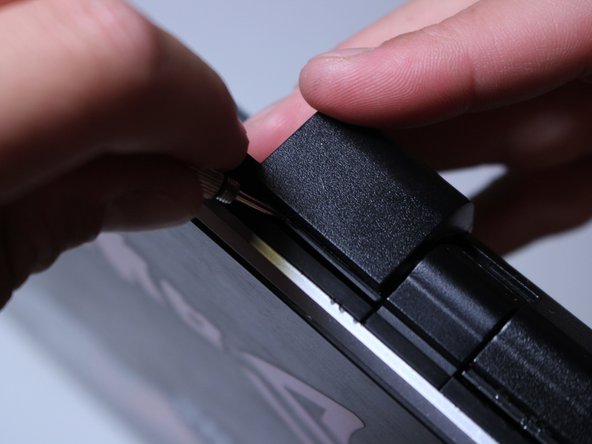
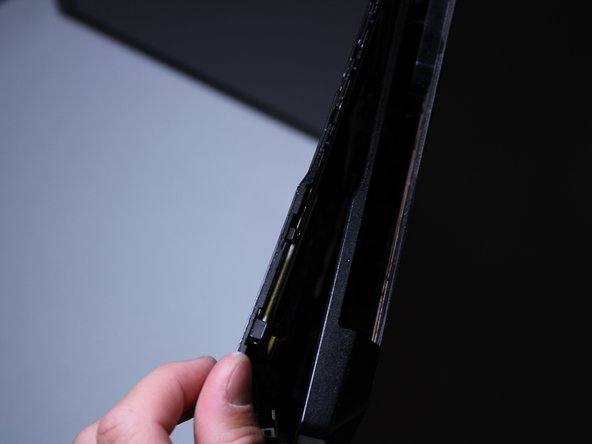
  • از اطراف لبه کیبورد به آرامی شروع کرده و دو قطعه را جدا کنید.

It is easier if you start on the headphone jack side of the computer.Slowly start making your way around the edge of the keyboard, prying the two pieces apart.Slowly start making your way around the edge of the keyboard, prying the two pieces apart.

مرحله ۱۵

  • همچنین از اطراف گوشه های پشت کامپیوتر کار کنید.

Work your way around the back corners of the computer as well.Work your way around the back corners of the computer as well.Work your way around the back corners of the computer as well.

مرحله ۱۶

  • پورت باتری در یک منطقه پوسته ای قرار دارد.
  • پشت کامپیوتر را باز کنید و از سمت دیگر کامپیوتر که درایو دیسک نوری قرار دارد شروع نمایید.

در زمان قطع کردن دو قطعه پلاستیکی، از دو دست خود می توان استفاده کرد.
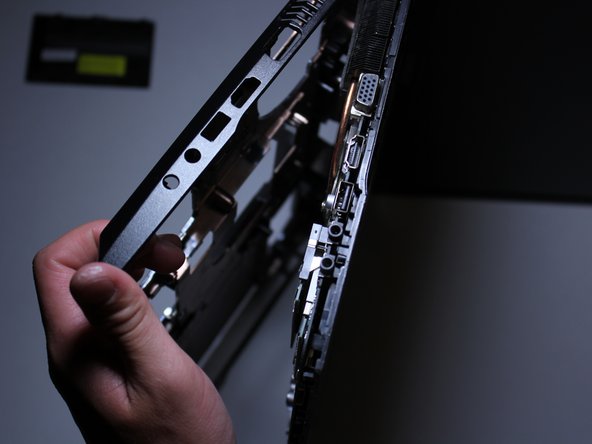
You also have to get the skinny area where the battery port is.This is easiest to get to by closing the computer shut.

مرحله ۱۷

  • مطمئن شوید که برای جدا کردن دو قطعه، از لبه ها شروع می کنید.

Further make your way around the edges separating the two pieces.Further make your way around the edges separating the two pieces.Further make your way around the edges separating the two pieces.

مرحله ۱۸

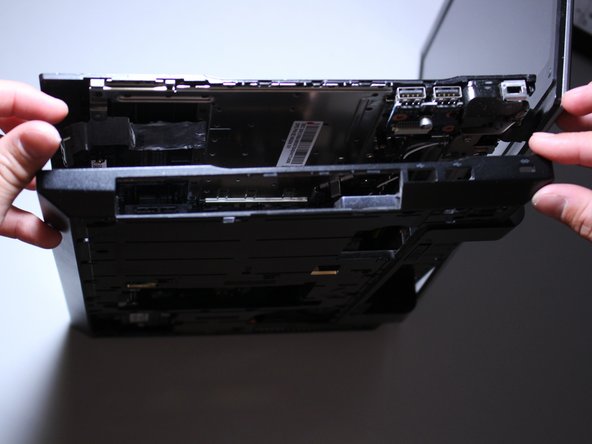
  • سپس از جلوی کامپیوتر شروع کنید.
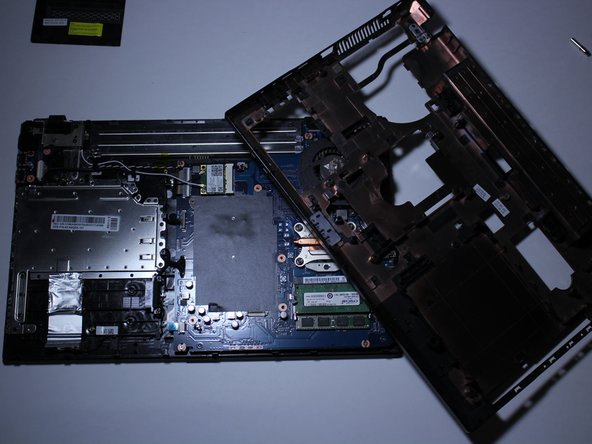
Make your way towards the front of the computer as well.

مرحله ۱۹

  • از لبه ها شروع نموده تا اینکه دو قطعه کاملا از هم جدا شوند.
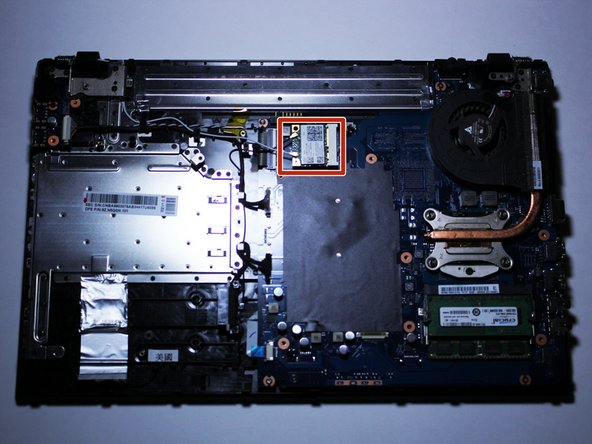
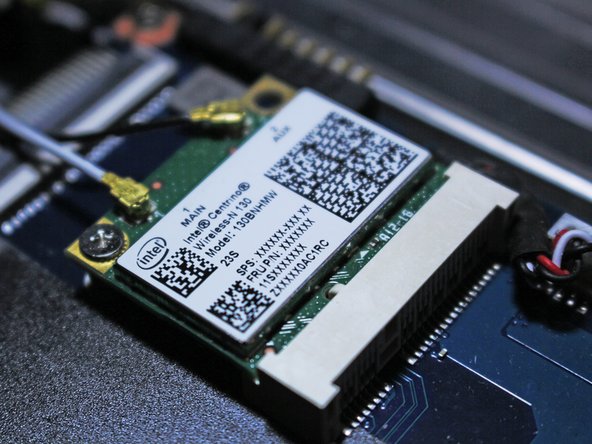
Work around the edges until you can separate the parts completely.Work around the edges until you can separate the parts completely.Work around the edges until you can separate the parts completely.

مرحله ۲۰

  • کارت وای فای را مشخص کنید.

چک کنید که کارت وای فای جدید مشابه با کارت قدیمی باشد.

از شماره مدل آن نیز مطمئن شوید.
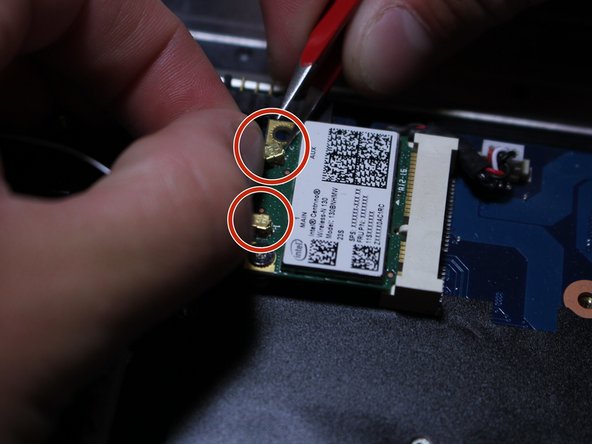
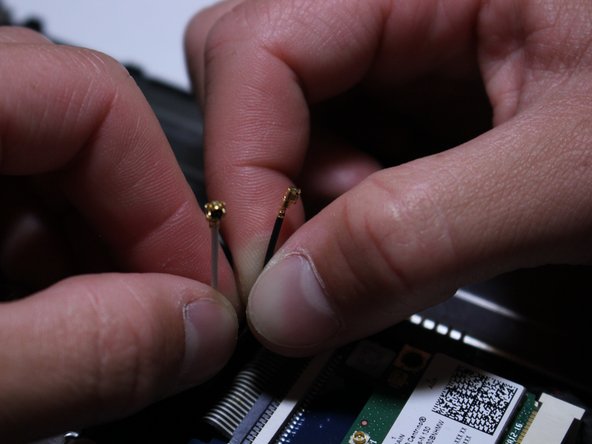
Locate the Wi-Fi card.Double check that the Wi-Fi card you bought is the same as the one in your computer now.

مرحله ۲۱

  • از نوک ناخن و موچین برای برداشتن کابل های ضربه ای از کارت وای فای استفاده کنید.

مطمئن شوید که کابل ها را دقیقا در جای خود قرار می دهید.
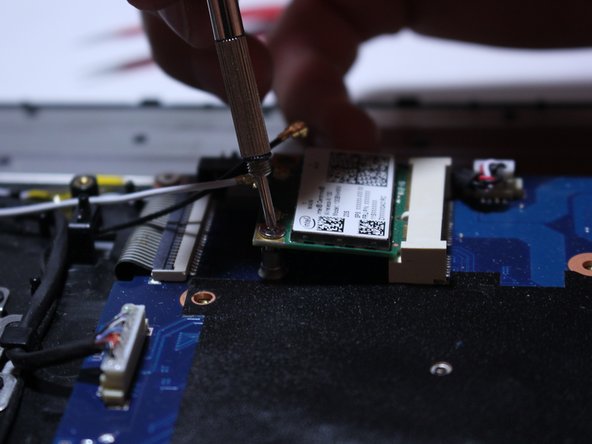
Use the tips of your fingernails and the assistance of your tweezers to remove the snap-on cables from the Wi-Fi card.MAKE SURE YOU REPLACE THE CABLES EXACTLY AS YOU FOUND THEM.MAKE SURE YOU REPLACE THE CABLES EXACTLY AS YOU FOUND THEM.

مرحله ۲۲

  • فقط ۱ پیچ کارت وای فای را محکم کرده است.
  • این پیچ ۴.۵ میلیمتری است.

کارت وای فای پس از برداشتن پیچ بصورت فنری بالا می آید.
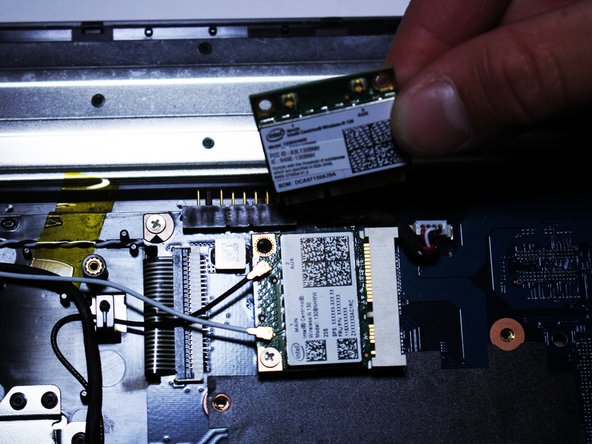
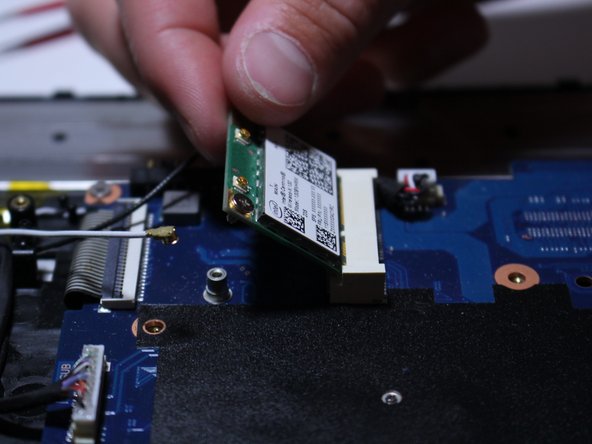
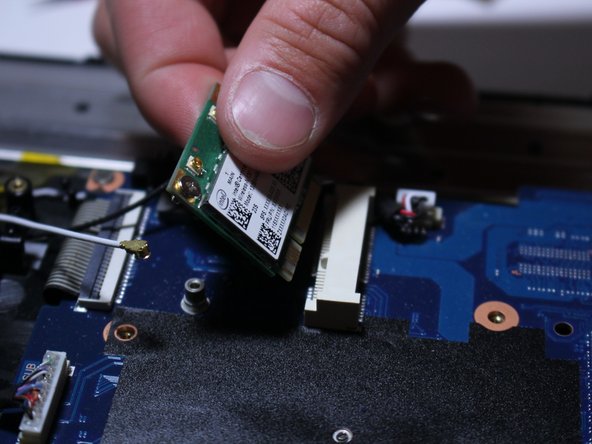
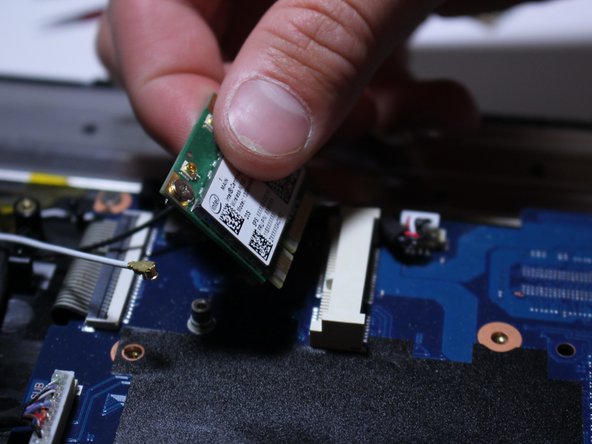
There is only 1 screw holding the Wi-Fi card in place.Remove this 4.5mm screw with your screwdriver.It is completely normal that the Wi-Fi card springs up after you remove the screw, its supposed to do this.

مرحله ۲۳

  • اکنون کارت وای فای را گرفته و به آرامی روبه بالا و بیرون بکشید.

Now grab the Wi-Fi card and slowly pull it up and outward as shown in the photos.Now grab the Wi-Fi card and slowly pull it up and outward as shown in the photos.Now grab the Wi-Fi card and slowly pull it up and outward as shown in the photos.

مرحله ۲۴

  • کارت وای فای جدید را وارد کرده و پیچ آن را ببندید.

مطمئن شوید که کابل ها در جای اصلی خود قرار بگیرند.

Insert your new Wi-Fi card and screw it into place with your screwdriver.

مرتبط: تعویض باتری لپ تاپ سری ۹ (NP900X4C) سامسونگ


دیدگاه‌ خود را بنویسید

نشانی ایمیل شما منتشر نخواهد شد. بخش‌های موردنیاز علامت‌گذاری شده‌اند *

11 + یازده =