نشانی: خ آزادی، خ بهبودی، نرسیده به نصرت، ساختمان بنیامین، پ 145، طبقه 5، واحد 18- مجهز به (2) آسانسور و پارکینگ- تماس: 66097851 (7 خط), 66030825-021

دفتر مرکزی: 66097851     مرکز تعمیرات: 66097859   شعبه شرق :77978135   شعبه هفت تیر: 88836102   شعبه جنوب: 55300568 شعبه غرب 44153186 شعبه شمال 26721443  
شعبه اسلامشهر و رباط کریم 56746602

مرحله ۱ پیاده سازی بلوری – ویژگی های خارجی

  • بلوری پلیر قادر به جابجایی ۱۰۸۰p خروجی بعلاوه چندین ویژگی هوشمند است.

This appears to be a run-of-the-mill Samsung Blu-Ray player, capable of handling 1080p output with downgrading for DVD's, plus a few smart features.This appears to be a run-of-the-mill Samsung Blu-Ray player, capable of handling 1080p output with downgrading for DVD's, plus a few smart features.

مرحله ۲

  • هیچ چیزی در پایین یا جلو وجود ندارد که به نحوه ترک خوردگی آن ضربه بزند.
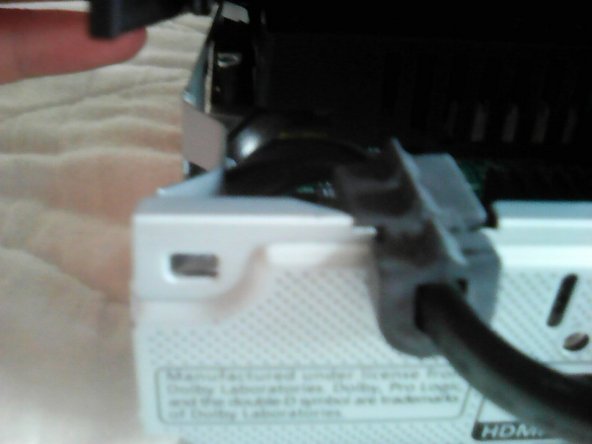
Nothing on the bottom or the front that hints at how to crack this #!@$% thing open! (DIY cussing. Let the games begin)Nothing on the bottom or the front that hints at how to crack this #!@$% thing open! (DIY cussing. Let the games begin)

مرحله ۳- I/O عقب

  • HDMI، اترنت، و خروجی صدای دیجیتالی چند محوری وجود دارند که با کافی برق دار می شوند.

It appears to have HDMI, Ethernet, and Coaxial "Digital Audio Out." And it's also powered by coffee, apparently.Safety first, kiddos!

مرحله ۴- موقعیت پیچ ها

  • موقعیت پیچ ها: یک پیچ در مرکز کافی، یک پیچ در بالای پورت HDMI.

The positions of the screws: One in the center (Above the coffee), one above the HDMI port, and that's it. Please tell me if there's a third, I can't remember.The positions of the screws: One in the center (Above the coffee), one above the HDMI port, and that's it. Please tell me if there's a third, I can't remember.

مرحله ۵

  • به هشدارها توجه کنید.

Guess it's too late to heed these warnings.

مرحله ۶- بلند کردن دهانه بیست (Beast)

  • دو لبه بیرونی DVD بلوری پلیر را بلند کنید.
  • کیس پلاستیکی بالا برای دسترسی راحت تر نیز می تواند برداشته شود.

Pry open the two outer edges of the DVD player. Look to the photos for reference.I removed the top plastic casing to make it easier to access. You can leave it on. (If you want to)I removed the top plastic casing to make it easier to access. You can leave it on. (If you want to)

مرحله ۷- داخل بیست

  • اسکن کد QR باید انجام شود که احتمالا لینک تعمیر یا چیز دیگری است.

Would ya look at that compactness? It's "amazing"! (I've seen better laptops than this)Y'all are welcome to scan that QR code. It's probably a repair link or something.Y'all are welcome to scan that QR code. It's probably a repair link or something.

مرحله ۸

  • برداشتن سیم AC.
  • از پین مرکز استفاده نمی شود.

Removing the AC wire. (Could've sworn that this thing shuddered when it lost power)

مرحله ۹- چک کردن وای فای

  • سیم دیتای وایرلس را بردارید. (چرا فقط ۵ سیم وجود دارد؟ آیا مبدل USB داخل آن مخفی شده است؟)

Removing the wireless data wire. (Why are there only 5 wires? Does it have a USB converter hidden inside?)Removing the wireless data wire. (Why are there only 5 wires? Does it have a USB converter hidden inside?)Removing the wireless data wire. (Why are there only 5 wires? Does it have a USB converter hidden inside?)

مرحله ۱۰

  • آیا سینک حرارتی داخل DVD بلوری پلیر است؟
  • سینک حرارتی دستگاه از قبل نصب شده است.

Well... that wasn't expected. A heatsink, inside a DVD player? Huh.

مرحله ۱۱- برداشتن روکش + کارت وای فای

  • این دکمه کوچک را بلند کنید تا کارت وایرلس برداشته شود. هیچ آنتن سیم دار وجود ندارد بنابراین می تواند به راحتی آن را بیرون کشید.
  • چندین پیچ نقره ای باعث اتصال روکش پلاستیکی شده اند. ابتدا آنها را برداشته تا روکش بتواند باز شود.

Pry out this little tab, to remove the wireless card. There's no wired antenna (It's on the board), so you can literally yank it out.

مرحله ۱۲- برداشتن دریچه ها

  • کیس فلزی را از بسته بندی کارخانه ای بیرون آورده که بنظر سیم دار است. چرا بردها به دو رنگ مختلف هستند؟

Metal casing, begone! Everything's literally out of the factory packaging, and it looks weird. Like, why are the boards 2 different colors(?)Metal casing, begone! Everything's literally out of the factory packaging, and it looks weird. Like, why are the boards 2 different colors(?)

مرحله ۱۳- خطا: هیچ کابلی متصل نیست

  • ناهنجاری کابل از دست رفته در دیسک خوان دیتای اولیه تشخیص داده شده است.

Bixby: "Sir, we've detected missing cable anomalies in the primary data disc reader. Please confirm connection."Anyone get my reference? (FRIDAY in Civil War)

مرحله ۱۴- رسانه­ی قابل جابجایی برداشت شده است

  • چگونه می توان یک کابل را پیدا کرد؟
  • قطعه لیزر بسیار مشکوک است.
  • DVD در زمان بارگیری نیز کار می کند.
  • دایره خاکستری یک شیار “خروج دستی” است. در این مورد DVD گیر می کند و دیگر نمی توان آن را برداشت.
  • بهتر است تا سینی را بیرون کشید تا این قطعه از بالا برداشته شود.

That's a lot of cabling? How does one know where to find what?That laser assembly looks suspicious. Guess I'll be opening it!It'd be awesome if I loaded up a DVD while this thing was running. Imagine the turbulence from the disc...

مرحله ۱۵

  • سینک حرارتی به دو دلیل برداشته می شود: ۱- نوع CPU مشخص شود و ۲- شاید از آن برای استفاده مجدد در RPi استفاده نمود.

I decided to pry off the heatsink for 2 reasons: 1) I want to see what kind of CPU it is. 2) Maybe reuse it for my RPi.I decided to pry off the heatsink for 2 reasons: 1) I want to see what kind of CPU it is. 2) Maybe reuse it for my RPi.I decided to pry off the heatsink for 2 reasons: 1) I want to see what kind of CPU it is. 2) Maybe reuse it for my RPi.

مرحله ۱۶- قلب دیگر این دستگاه

  • CPU: MediaTek MT8553 ARM (32 بیت، ۸۰۰ مگاهرتز تک هسته ای)، همچنین رم DDR3 وجود دارد که توسط سامسونگ ساخته شده است (ظرفیت N/A).

Apparently this ain't an Exynos CPU. I'm disappointed. At least it's MediaTek...

مرحله ۱۷- برد مدار

  • فلش مموری (ظرفیت N/A، احتمالا حدود ۲ گیگا بایت)
  • تراشه TI ناشناخته

Flash memory (Capacity N/A, probably around 2GB)

مرحله ۱۸

  • یک منبع برق TINY وجود دارد. که احتمالا کوچکتر از شارژر لپ تاپ می باشد.
  • بله حتی کوچکتر از جعبه شارژر لنوو است.

That is one TINY power supply. Like, seriously,  I think it may be smaller than a laptop charger!Yup, it's smaller than my Lenovo's charger box. Wow...

مرحله ۱۹

  • حلقه سفید سیم دار باید برداشته شود.

This weird white goop broke off. I assume it's an epoxy of some kind, but why?This weird white goop broke off. I assume it's an epoxy of some kind, but why?

مرحله ۲۰- برداشتن اتصالات جلو

  • جالب است که مشابه با هدر RPi می باشد.

Interesting... that looks like an RPi header! I wonder if there's...

مرحله ۲۱- بلستر IR

  • در اینجا بخشی از I/O در جلو مشاهده می شود. پورت USB در سمت دیگر است (USB 2.0 از نوع A).

Here's part of the I/O on the front. The USB port is on the other side.  (USB 2.0 type A)

مرحله ۲۲- تئوری

  • چرا آنها آن را این چنین طراحی نکرده اند؟

Why didn't they design it like this? I'm a bit stumped.

مرحله ۲۳- فشار ندادن دکمه ها

  • تمام دکمه ها روبه جلو فشار داده می شوند اما هنوز دکمه های روی PCB روبه بالا فشرده می شوند. چگونه این کار انجام می شود؟
  • هر دکمه در واقع یک اهرم کوچک است، بنابراین زمانی که آن را به یک طرف فشار می دهید، اندکی حرکت کرده تا دکمه واقعی را فشار دهد.

All the buttons are front press style, but yet the buttons on the PCB are top press? How does this work?Each button is actually a small lever, so when you press it one way, it pivots slightly to push the actual button.

مرحله ۲۴

  • کل بلوری پلیر منسوخ شده است، و دیگر فیلم نشان نمی دهد. بنابراین آن را نباید پیاده سازی کرد.
  • ابزارهای نشان داده شده نمونه ای از آنچیزی هستند که استفاده شده اند.
  • هر پیچ باید برداشته شود.

And with that, the entire Blu-Ray player is dead, never to play a movie again. You don't have to tear it down all the way like I did.The tools shown are an example of what I used, you don't have to be as specific.Every single screw I removed. It's gonna be tough trying to put this back together without duct-tape...

اطلاعات بیشتر درمورد محصول، در صورت تمایل به تهیه آن

مقاله های مرتبط با تعمیر dvd player بیشتر برای شما: تعویض موتور درایو دیسک HD850 دی وی دی پلیر سامسونگ

دیدگاه‌ خود را بنویسید

نشانی ایمیل شما منتشر نخواهد شد. بخش‌های موردنیاز علامت‌گذاری شده‌اند *

10 + بیست =